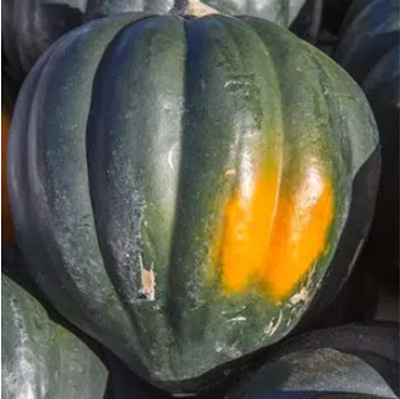
Color Change: Typically, a ripe acorn squash will be dark green, almost black, with a noticeable orange spot where it has been resting on the ground. This color contrast indicates that your squash is ready for harvest.
Rind Hardness: Another crucial factor in determining ripeness is the hardness of the rind. A mature acorn squash will have a tough, thick skin that cannot be easily pierced with a fingernail. If the rind is still soft, give it more time to mature.
Stem Condition: The stem condition is also a telltale sign of ripeness. When the stem starts to wither and turns brown, it strongly indicates that the squash is fully mature. A green stem usually means the squash needs more time on the vine.
*Most relevant information from the article is posted above, but please see the link for more details!*
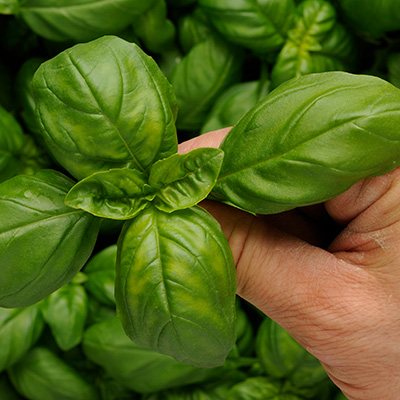
There are two ways to prune basil: harvesting leaves or full stems. Harvest leaves if you need a small amount for a recipe. Harvest entire stems for larger amounts of basil for specific recipes, such as pesto.
Pluck each leaf right at its base where it hits the stem.
Harvest from the top of the plant so your basil stays fuller, rather than harvesting lower leaves and creating a sparse bottom.
If you trim extra basil for the health and yield of your plant, you can store the extra harvest. Opt for the stem-trimming method when you harvest more. Place extra stems in a small jar of water and keep them at room temperature and out of direct sunlight.
*Most relevant information from the article is posted above, but please see the link for more details!*
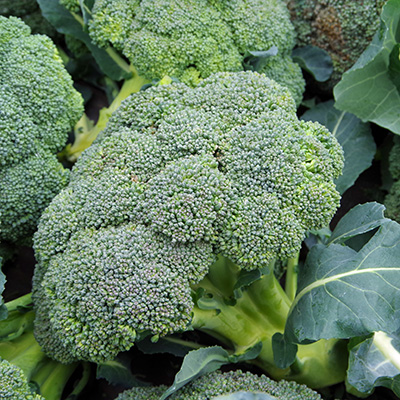
Most broccoli varieties will form heads between 4-8 inches across when fully mature.
Make sure the head has reached a good size for eating.
The most reliable indicator of when your broccoli is ready to harvest is bud tightness. Fresh, ready-to-harvest broccoli has tiny flower buds that are tightly packed together, creating that classic dense surface we associate with good broccoli. The individual buds should be dark green (for most varieties) and barely visible as separate pieces.
A good stalk should feel solid and substantial, with enough diameter to support the head without bending. It should also be a healthy green color throughout.
Morning-cut broccoli stays fresh longer in storage and has a better texture when cooked.
When you’ve determined your broccoli is ready to harvest, use a sharp knife to cut the stem about 6 inches below the head.
For example, broccoli that looks like it has another week to grow can suddenly start flowering if temperatures spike above 75°F (24°C) for several consecutive days.
*Most relevant information from the article is posted above, but please see the link for more details!*
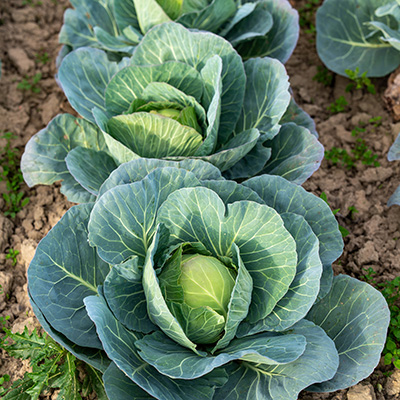
A ready-to-pick cabbage will also be firm to the touch with the average head weighing between one and three pounds.
“Just take a sharp knife and carefully slice the head from the cabbage plant, cutting through the stem. The stem can be tough, so use caution. There are two spots where you can cut. The first is at the base of the cabbage head and above the outer leaves. The second is to cut at ground level removing the entire plant from the garden”
*Most relevant information from the article is posted above, but please see the link for more details!*
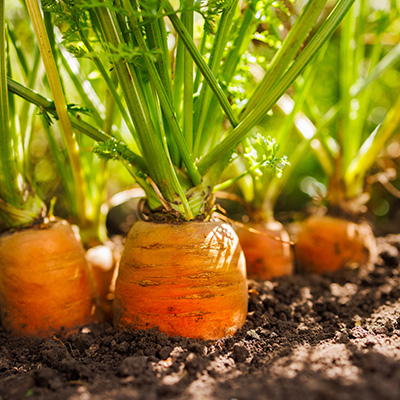
If you want slender baby carrots for a gourmet meal in the early spring, you can tug them from the soil in as little as 30 or 40 days.
The shoulder of a carrot is the top of the root, just below where the greens emerge
If you wait until they are between the diameter of a nickel and a quarter, you’ll have the largest, juiciest roots.
*Most relevant information from the article is posted above, but please see the link for more details!*
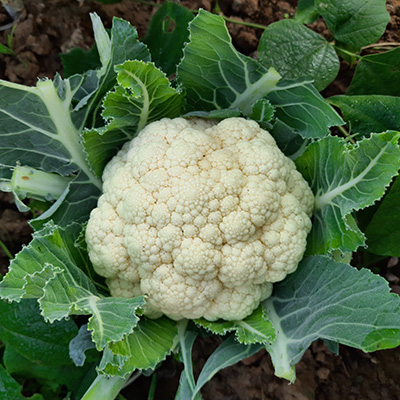
When the crowns are 6-8 inches in diameter
Compact and uniformly colored
Firm to the touch
The “curds start separating”
Cut the main stem 3-4 inches below the crown with a sharp knife, leaving some leaves attached
*Most relevant information from the article is posted above, but please see the link for more details!*
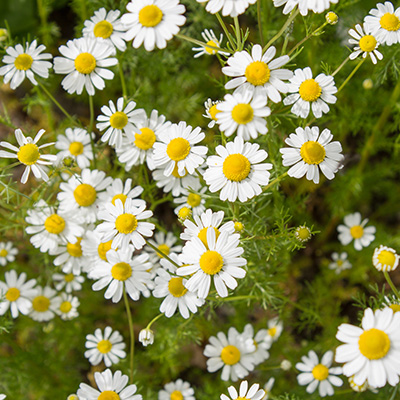
The optimal moment to pick a chamomile flower is when the white ray petals are fully extended, sitting horizontally or slightly upward, before they begin to droop toward the stem. This stage usually occurs three to five days after the bud first opens, marked by the central yellow disc florets being about two-thirds open
*Most relevant information from the article is posted above, but please see the link for more details!*
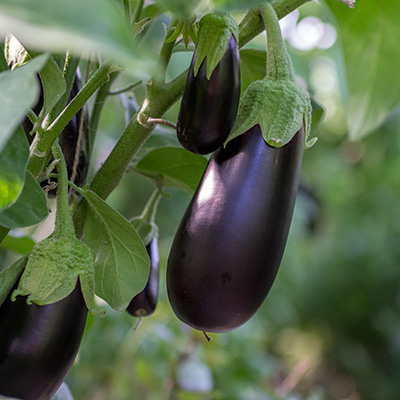
When an eggplant is perfectly ripe, its skin takes on a deep, glossy sheen.
Whether it’s a classic dark purple variety like ‘Black Beauty’ or a pale lavender heirloom like ‘Rosa Bianca’, the surface should reflect light clearly.
If it leaves a slight indentation that quickly springs back, it’s ready.
*Most relevant information from the article is posted above, but please see the link for more details!*
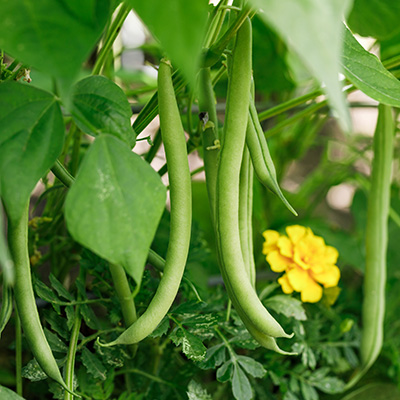
Harvest when green beans are 4-6 inches long
Firm and crisp
The pods looked like they are full
They are evenly green
Snap the pea off with your nail or shears right above where the growth from the vine starts
*Most relevant information from the article is posted above, but please see the link for more details!*
Video on harvesting: https://youtu.be/sOMr5bpaKEU?si=_n8EyxI8Xj8MBvwL
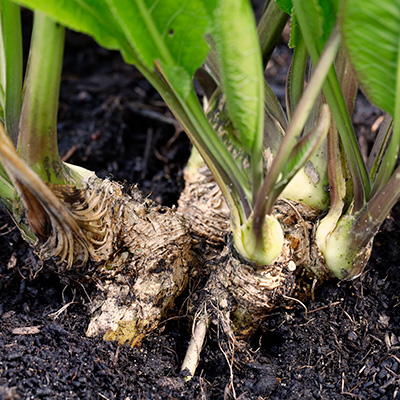
After the foliage has died down or turned yellow, you are good to dig for horseradish.
Find the crown and dig several inches away from it, dig straight down for several inches. Push up to get the root out. Clean your roots and enjoy.
“Horseradish roots grow underground and their pungency intensifies with cold weather. A hard frost or several frosts in the fall help concentrate the heat-shock proteins that give horseradish its sharp kick”
*Most relevant information from the article is posted above, but please see the link for more details!*
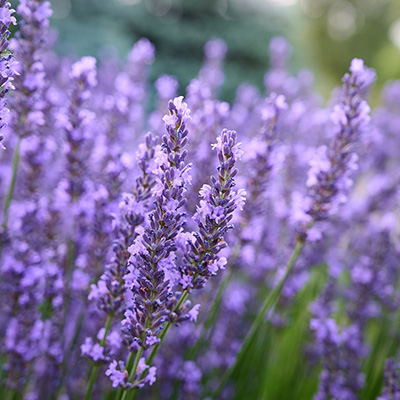
When the flowers are just about to open, some flowers are emerging but majority are closed
⅔ of the tiny individual flowers on each spike have opened
You can also gently brush your hand over the flowers and if you can still smell it on your hands you pay harvest
With scissors, gather a handful of stalks before cutting 2-3 inches above the woody base and bundle them with an elastic
Hang upside down in a dark dry with enough airflow until for about 4 weeks or if you squeeze the flower with your fingers its should almost crumbly
Once fully dry you can take off the flowers from the stem and store
*Most relevant information from the article is posted above, but please see the link for more details!*

Wait until the tops of the onion are folded or droopy
The shoulder of the onions are pooping up from the ground
The shoulder of the onion is a good diameter, not a pencil but maybe bigger than a quarter
*Most relevant information from the article is posted above, but please see the link for more details!*

Look at the pepper and determine its a good size
They are firm, crisp and solid in texture
They are the correct color of your variety
The skin is smooth and shiny
Corking: fine white or tan lines on the skin that indicate ripening and are often desirable in hot peppers
If you tug on the peppers and they come off easily they are good for harvesting
Dry stem
Poblano: deep, dark green color, glossy skin, and firm texture.
Jalapeno: 3-5 inches, firm, can be picked green or red.
Wax: glossy yellow.
Serrano: 2-4 inches, can be harvested when green, orange, red.
Cayenne: 3-6 inches, bright red, glossy and firm.
*Most relevant information from the article is posted above, but please see the link for more details!*

Look at the pepper and determine its a good size
They are firm, crisp and solid in texture
They are the correct color of your variety
The skin is smooth and shiny
Corking: fine white or tan lines on the skin that indicate ripening and are often desirable in hot peppers
If you tug on the peppers and they come off easily they are good for harvesting
Dry stem
Bell Pepper: glossy skin, 3 inches in diameter or when firm
Banana Pepper: 4-8 inches, pale yellow
*Most relevant information from the article is posted above, but please see the link for more details!*
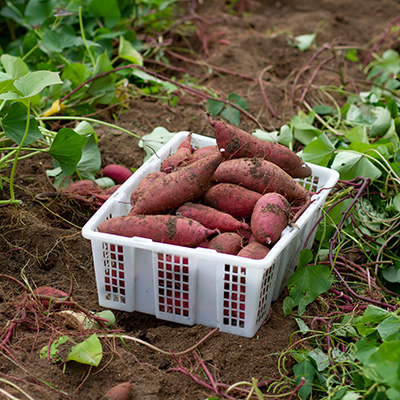
Late summer
The leafy vines begin to yellow and wilt; the potatoes are close to maturity
Full size is around 2 inches in diameter and 5 inches long
You may want to dig a test tuber (one potato) and see if it fits the measurements, and then harvest the rest of the potatoes
To harvest you would trim the vines, dig and lift the roots and let them sit for a week or two in a warm location so they become sweeter
Avoid leaving the sweet potatoes in the cold as they will die
Bell Pepper: glossy skin, 3 inches in diameter or when firm
Banana Pepper: 4-8 inches, pale yellow
*Most relevant information from the article is posted above, but please see the link for more details!*
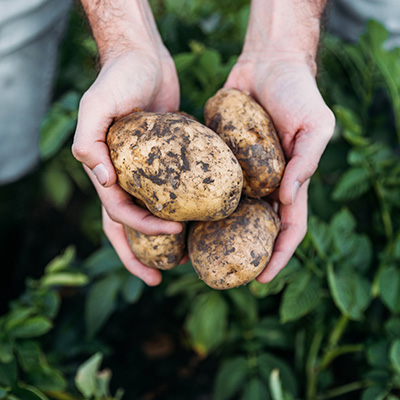
When the top foliage has yellowed and died back
If you dig a test potato and rub the skin with your thumb and it stays they are good for harvesting
Green potatoes are toxic to consume, they are exposed to the sun and contain toxic amounts of solanine that cause nausea and vomiting.
*Most relevant information from the article is posted above, but please see the link for more details!*
If you gently tug and they come off, they are ready.
They have uniform color
They are firm to the touch
Some varieties have a yellow hue; others are orange
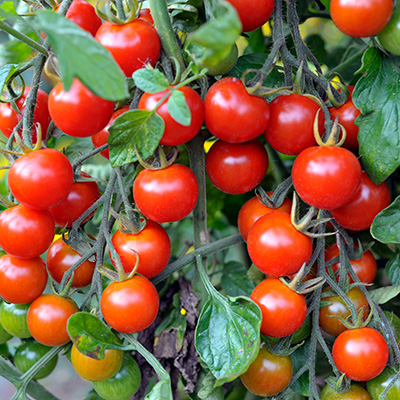
Cherry Tomatoes
Harvest when red
If you gently pull and they come off, they are good to harvest!
*Most relevant information from the article is posted above, but please see the link for more details!*
Please enjoy them as you wish 🙂
They are a burst of flavour and go well with salads, on a sandwich or by themselves!
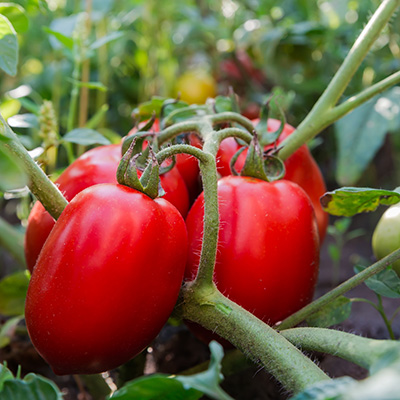
If you gently tug and they come off, they are ready.
They have uniform color
They are firm to the touch
Some varieties have a yellow hue; others are orange
Roma Tomatoes
At around 2-3 inches they will be ready but, if they are red and firm they are good to go
*Most relevant information from the article is posted above, but please see the link for more details!*
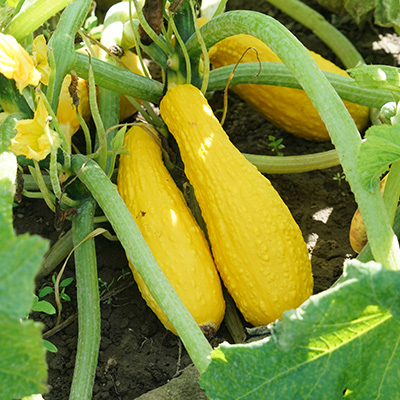
Harvest when the skin is tender to the touch. If you can prick your finger through the skin they are good to go
The skin is shiny
The best time is to get them when they are small and tender.
Cut about 2inches of the vine along with the squash
Zucchini: 6-8 inches
Yellow Squash: 6-8 inches
Patty: 2-6 inches in diameter
*Most relevant information from the article is posted above, but please see the link for more details!*
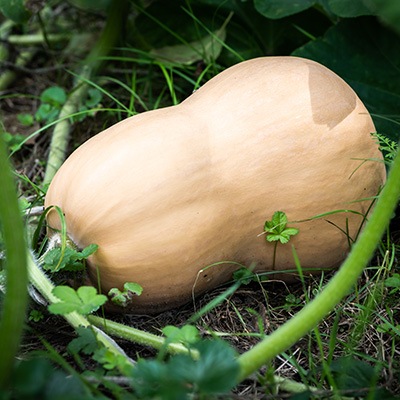
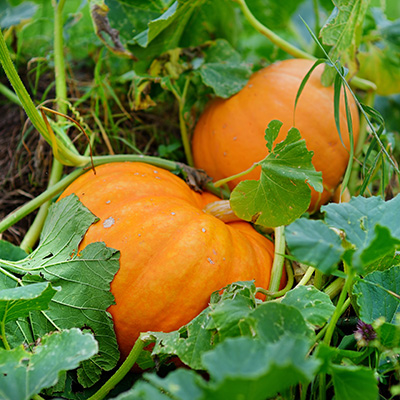
It is best to pick them when they are fully matured.
They are ready when the plant has died or after first frost
The squash should sound hollow when you tap it.
They should have a thick and hardy skin (not be able to pierce it with a fingernail)
The stem should be dry almost wood like
Butter: uniform tan-cream color
Spaghetti: deep yellow hue
*Most relevant information from the article is posted above, but please see the link for more details!*